Cleaning your Keurig K-Compact is an essential task to maintain its performance and ensure a fresh-tasting brew every time you make your favorite cup of coffee. Over time, mineral deposits and residue from coffee grounds can build up inside the machine, affecting its efficiency and the flavor of your beverage.
One effective and natural way to clean your Keurig K-Compact is by using vinegar, a household staple known for its cleaning properties. In this guide, we’ll walk you through the steps to effectively clean your Keurig K-Compact with vinegar.
Gather Your Supplies
Before you begin the cleaning process, it’s important to gather all the supplies you’ll need. Here’s a list of items you’ll need to clean your Keurig K-Compact with vinegar:
White distilled vinegar: Vinegar is the star of the show when it comes to cleaning your Keurig K-Compact. It’s a natural and eco-friendly cleaning agent that effectively removes mineral deposits, coffee residue, and germs from your coffee maker. You’ll need a sufficient amount of white distilled vinegar to perform the cleaning process.

Clean water: You’ll need clean water to flush out the vinegar from your Keurig K-Compact after cleaning. Make sure you have enough water available for rinsing purposes.
Microfiber cloth or sponge: A microfiber cloth or sponge will come in handy for wiping down the exterior of your Keurig K-Compact, as well as cleaning the removable parts. It’s best to use a soft and non-abrasive cloth to avoid scratching or damaging the surfaces of your coffee maker.
Soap or dish detergent: You may need some mild soap or dish detergent to clean the external parts of your Keurig K-Compact, such as the water reservoir, drip tray, and K-Cup holder. Make sure to use a gentle soap that won’t leave any residue or flavors behind.
Toothbrush or small brush: A toothbrush or a small brush will be useful for cleaning hard-to-reach areas, such as the K-Cup holder and the needle that punctures the K-Cup. Choose a soft-bristled toothbrush or a small brush that won’t scratch or damage the parts.
Paperclip or similar tool: You’ll need a paperclip or a similar tool to unclog the needle that punctures the K-Cup. This is an important step to ensure that your Keurig K-Compact brews coffee properly and efficiently.
Optional: Descaling solution or citric acid: If your Keurig K-Compact has severe mineral buildup or you prefer using a descaling solution, you may need to purchase a descaling solution or citric acid. Follow the manufacturer’s instructions for using these products.
Having all these supplies ready before you start the cleaning process will ensure a smooth and efficient cleaning experience. Once you have everything in place, you’re all set to move on to the next step: cleaning the different parts of your Keurig K-Compact with vinegar.
Step-by-Step Cleaning Guide
Step-1: Descaling the Water Reservoir
One of the first steps in cleaning your Keurig K-Compact with vinegar is descaling the water reservoir. Over time, mineral deposits can build up in the water reservoir, affecting the performance of your coffee maker. Here’s how to descale the water reservoir:
Turn off and unplug your Keurig K-Compact: Safety first! Before you start cleaning, make sure your coffee maker is turned off and unplugged from the power source.
Empty the water reservoir: Remove the water reservoir from your Keurig K-Compact and discard any remaining water. If there’s a water filter in the reservoir, remove it as well.
Mix vinegar and water solution: In a clean container, mix equal parts of white distilled vinegar and water. For example, you can use 8 ounces of vinegar and 8 ounces of water to create a 16-ounce cleaning solution.
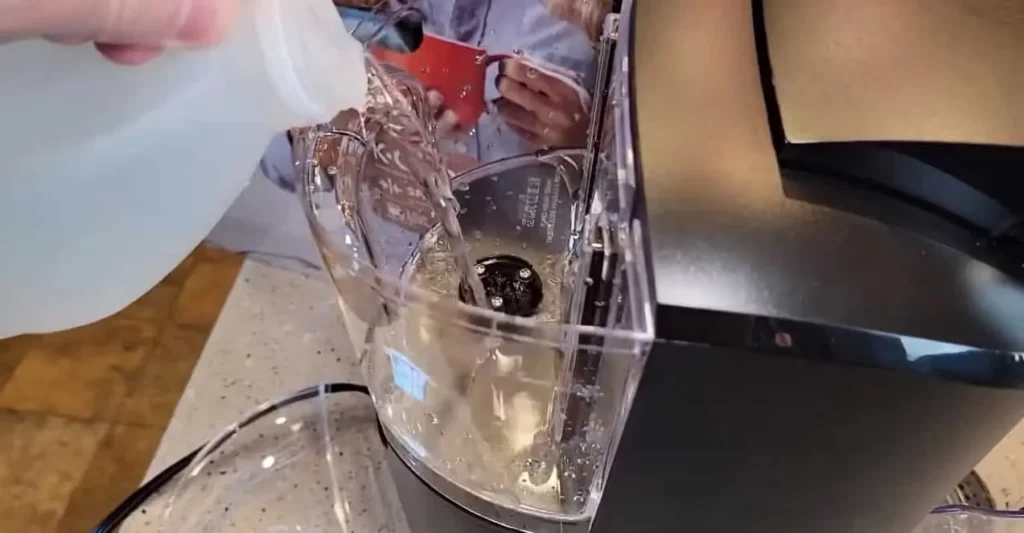
Fill the water reservoir: Pour the vinegar and water solution into the water reservoir of your Keurig K-Compact. Make sure to fill it up to the maximum fill line or the top of the reservoir.
Let the solution sit: Allow the vinegar and water solution to sit in the water reservoir for about 30 minutes. This will help to dissolve the mineral deposits and descale the reservoir.
Rinse the water reservoir: After 30 minutes, empty the vinegar and water solution from the water reservoir. Rinse the reservoir thoroughly with clean water to remove any remaining vinegar smell or residue.
Dry and reassemble the water reservoir: Use a clean cloth to wipe the water reservoir dry. Once it’s completely dry, reassemble it by placing any filters back in place and reattaching it to your Keurig K-Compact.
Descaling the water reservoir is an important step to ensure that your coffee maker operates at its best and produces delicious cups of coffee. We’ve covered in detail on how to descale keurig k compact.
With a clean water reservoir, you’re ready to move on to the next step in the cleaning process: cleaning the external parts of your Keurig K-Compact.
Step-2: Cleaning the Brewer and K-Cup Holder
The brewer and K-Cup holder are crucial components of your Keurig K-Compact, as they come into direct contact with the coffee grounds and water during the brewing process. Cleaning these parts regularly is essential for maintaining the quality of your coffee and ensuring the longevity of your coffee maker. Here’s how to clean the brewer and K-Cup holder:
Remove the K-Cup holder: Open the brewer handle and remove the K-Cup holder by pulling it out from the brewer. Be careful as it may be hot.
Disassemble the K-Cup holder: The K-Cup holder consists of several parts, including the K-Cup holder housing, exit needle, and bottom needle. Take them apart by removing the bottom needle and separating the housing from the exit needle.
Wash the parts with warm soapy water: Wash all the parts of the K-Cup holder with warm, soapy water. Use a soft brush, like a toothbrush, to scrub away any coffee residue or buildup. Pay extra attention to the exit needle, as it can get clogged with coffee grounds. Rinse the parts thoroughly with clean water.
Clean the brewer: Wipe down the brewer, including the inside of the brewer where the K-Cup holder goes, with a clean, damp cloth. Be sure to remove any coffee grounds or residue that may have accumulated.
Dry and reassemble the K-Cup holder: After washing, make sure to dry all the parts of the K-Cup holder completely. Once dry, reassemble the K-Cup holder by attaching the housing to the exit needle and inserting the bottom needle back into place.
Reinstall the K-Cup holder: Slide the K-Cup holder back into the brewer and close the handle securely.
Regularly cleaning the brewer and K-Cup holder of your Keurig K-Compact will ensure that they are free from coffee residue or buildup, which can affect the taste and quality of your coffee. Plus, a clean brewer and K-Cup holder will help your coffee maker perform at its best, ensuring a delightful brewing experience every time.
Step-3: Cleaning the Drip Tray and Drip Tray Plate
The drip tray and drip tray plate of your Keurig K-Compact are responsible for collecting any excess water or coffee that may drip during the brewing process. Over time, they can accumulate residue and become dirty, which can affect the cleanliness and functionality of your coffee maker. Here’s how to clean the drip tray and drip tray plate:
Remove the drip tray: The drip tray is located at the bottom of your Keurig K-Compact, underneath the brewer. Gently pull it out to remove it from the coffee maker.
Empty and wash the drip tray: Empty any water or coffee residue from the drip tray and wash it with warm, soapy water. Use a soft cloth or sponge to clean the surface thoroughly, paying attention to any grooves or crevices where dirt may accumulate. Rinse the drip tray with clean water and pat it dry with a towel.
Clean the drip tray plate: The drip tray plate is the part that sits underneath the drip tray and collects any excess liquid. Remove it from the coffee maker and wash it with warm, soapy water. Use a brush or cloth to clean both sides of the drip tray plate, ensuring that it is free from any residue or buildup. Rinse the drip tray plate thoroughly and dry it with a towel.
Reassemble the drip tray and drip tray plate: Once both the drip tray and drip tray plate are clean and dry, reassemble them by inserting the drip tray plate back into its designated slot and sliding the drip tray back into place underneath the brewer.
Cleaning the drip tray and drip tray plate regularly is important to prevent any buildup of residue or dirt, ensuring that your Keurig K-Compact remains clean and functional. It also helps to maintain the overall cleanliness of your coffee station and provides a better brewing experience for your favorite cup of coffee.
Rinse and Final Steps
After completing the descaling and cleaning process, it’s essential to rinse your Keurig K-Compact to remove any remaining vinegar or cleaning solution. Here’s how to do it:
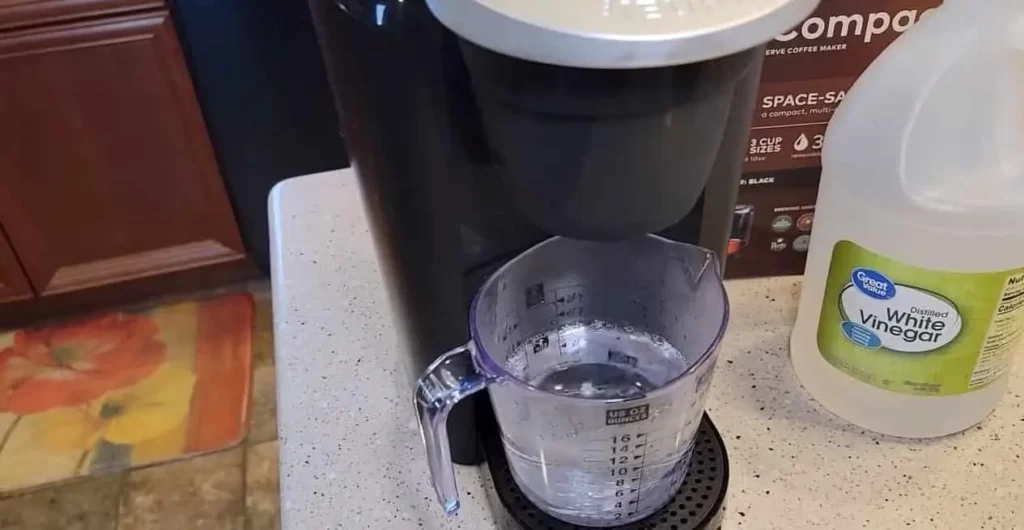
Rinse the water reservoir: Fill the water reservoir with fresh water up to the maximum fill line. Run a brew cycle without a K-Cup to flush out any residual vinegar or cleaning solution from the water reservoir. Repeat the process with a second brew cycle to ensure thorough rinsing.
Rinse the brewer and K-Cup holder: Open and close the brewer handle without inserting a K-Cup. Press the brew button to run a brew cycle, allowing clean water to flow through the brewer and K-Cup holder, flushing out any remaining vinegar or cleaning solution.
Rinse the drip tray and drip tray plate: Remove the drip tray and drip tray plate from your Keurig K-Compact and rinse them with clean water to remove any residue or cleaning solution. Dry them thoroughly with a towel.
Reassemble and run additional cycles: Once all the components are rinsed and dried, reassemble the coffee maker by inserting the drip tray plate and drip tray back into their designated slots. Close the brewer handle and run a few additional brew cycles with fresh water to ensure that all the vinegar or cleaning solution is thoroughly rinsed out.
Wipe down the exterior: Finally, use a damp cloth to wipe down the exterior of your Keurig K-Compact, including the housing, buttons, and display (if applicable), to remove any spills, stains, or residue.
Additional Tips and Troubleshooting (Optional)
In addition to the step-by-step cleaning guide, here are some additional tips and troubleshooting suggestions to further help you maintain your Keurig K-Compact:
Use filtered water: Using filtered water in your Keurig K-Compact can help reduce the buildup of mineral deposits, scale, and residue. It’s especially important if you live in an area with hard water, as hard water can cause more rapid buildup in your coffee maker.
Clean the needle regularly: The needle that punctures the K-Cup in the K-Cup holder can become clogged with coffee grounds or debris over time, affecting the brewing process. Use a paperclip or a Keurig-approved cleaning tool to gently clean the needle to ensure it remains clear and functional.
Clean the exterior: While the interior components of your Keurig K-Compact are crucial for brewing coffee, don’t forget to clean the exterior as well. Wipe down the external surfaces of your coffee maker, including the water reservoir, brewer, and drip tray, with a damp cloth to remove any spills, stains, or residue.
Perform regular maintenance: In addition to descaling and cleaning, regularly check for any loose or damaged parts, such as the water reservoir, K-Cup holder, and drip tray. If any parts are showing signs of wear or damage, replace them promptly to avoid any further issues with your coffee maker.
Troubleshooting: If you encounter any issues with your Keurig K-Compact, such as slow brewing, weak coffee, or error messages, consult the manufacturer’s manual or Keurig’s website for troubleshooting tips. If the issue persists, contact Keurig customer support for further assistance.
Conclusion
Congratulations! Your Keurig K-Compact is now clean and ready to brew your favorite cup of coffee with its full flavor and efficiency restored. Remember, regular cleaning and maintenance will keep your Keurig running smoothly and provide you with delightful cups of coffee for a long time to come.
A. I. Moon
A.I. Moon, an experienced SEO Pythonista, spends his days coding and developing web applications to help business owners. A passionate coffee enthusiast, he believes that drinking coffee fuels his creativity and productivity. His day isn't complete without the rich aroma and invigorating warmth of a perfectly brewed cup. This love for coffee inspired him to found EspressoRivo, a platform dedicated to sharing his coffee knowledge and fostering a community of passionate aficionados.