Your Keurig K Compact is an invaluable companion, faithfully delivering your daily dose of caffeine with convenience and speed.
However, like any piece of machinery, it requires regular maintenance to ensure it continues performing at its best. Descaling is a crucial part of this maintenance routine, aimed at removing mineral build-up that can affect the taste and efficiency of your coffee maker.
Materials Needed for Descaling
Before you begin the descaling process for your Keurig K Compact, you will need a few materials to ensure a successful descaling experience. Here are the materials you will need:
- Descaling Solution or Vinegar: You will need a descaling solution specifically designed for coffee makers, or white vinegar can also be used as a natural descaling agent. Descaling solutions are readily available at most grocery stores or online, and they are formulated to effectively remove mineral deposits without damaging the internal components of your coffee maker. If you prefer to use vinegar, make sure it is white vinegar, as other types of vinegar can leave a strong taste or odor in your coffee maker.

- Water: You will need clean, fresh water for the descaling process. It’s best to use filtered or distilled water to avoid introducing additional minerals into your coffee maker.
- Empty Container or Mug: You will need a container or mug that is large enough to hold the descaling solution or vinegar and water mixture that will be used to descale your coffee maker. Make sure the container or mug is clean and free from any coffee residue or oils.
- Clean Cloth or Sponge: You will need a clean cloth or sponge to wipe down the exterior of your coffee maker during the descaling process. This will help remove any coffee stains or spills that may have accumulated on the surface of your machine.
- Optional: Toothbrush or Soft Brush: If there are hard-to-reach areas in your coffee maker, such as the water reservoir or the drip tray, a toothbrush or a soft brush can be useful for gently scrubbing away mineral deposits.
Having these materials on hand before you start the descaling process will ensure a smooth and effective descaling experience. In the next section, we will provide a step-by-step guide on how to descale your Keurig K Compact using these materials, so you can enjoy a freshly brewed cup of coffee without any mineral build-up.
Step-by-Step Descaling Process
Now that you have gathered all the materials needed for descaling your Keurig K Compact, let’s dive into the step-by-step process to effectively descale your coffee maker:
Step 1: Prepare Your Keurig K Compact
Start by ensuring that your Keurig K Compact is powered off and unplugged. Remove any used K-Cups or coffee pods from the coffee maker and empty the water reservoir. If there is any water left in the reservoir, carefully pour it out and discard.
Step 2: Prepare Descaling Solution or Vinegar Mixture
If you are using a descaling solution, follow the manufacturer’s instructions to mix the appropriate amount of descaling solution with water in the water reservoir. Typically, a 1:1 ratio of descaling solution to water is recommended. If you are using vinegar, mix equal parts of water and white vinegar in a container or mug.
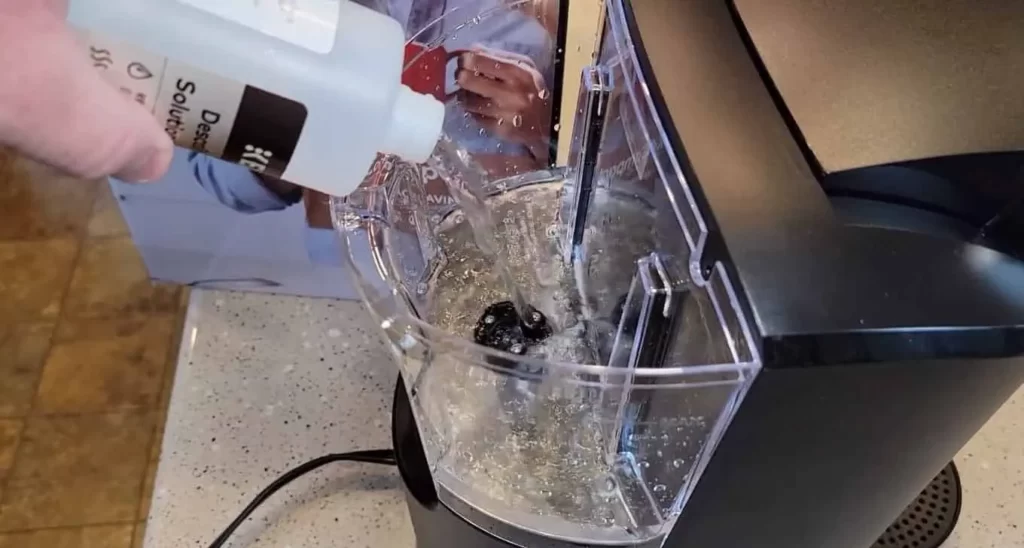
Step 3: Add Descaling Solution or Vinegar Mixture to Water Reservoir
Carefully pour the descaling solution or vinegar mixture into the water reservoir of your Keurig K Compact. Make sure to fill it up to the maximum fill line or as per the manufacturer’s instructions.
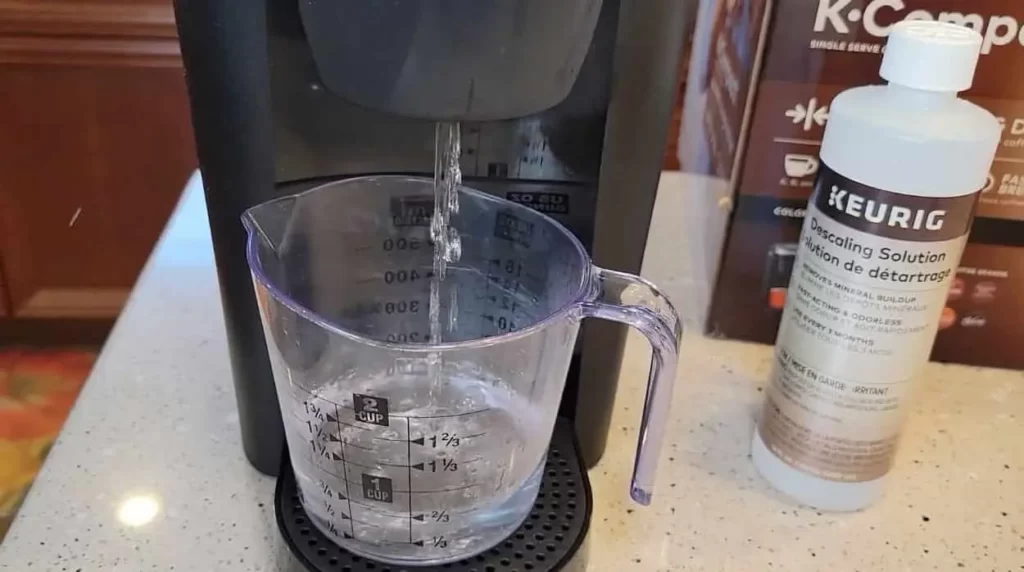
Step 4: Start the Descaling Process
Place a large empty container or mug on the drip tray to collect the descaling solution or vinegar mixture as it cycles through your coffee maker. Turn on your Keurig K Compact and start the brewing cycle without inserting any K-Cups or coffee pods. Allow the solution to cycle through the machine and into the container or mug.
Step 5: Repeat Brewing Cycle
Once the first brewing cycle is complete, empty the container or mug and place it back on the drip tray. Repeat the brewing cycle process until the water reservoir is empty or until the descaling solution or vinegar mixture has cycled through the machine multiple times as per the manufacturer’s instructions. This will help ensure that the descaling solution or vinegar effectively cleans all the internal components of your coffee maker.
Step 6: Rinse with Fresh Water
After the descaling process is complete, fill the water reservoir with clean, fresh water. Run multiple brewing cycles with just water to rinse out any remaining descaling solution or vinegar residue from the machine. This will help prevent any taste or odor of the descaling solution or vinegar from lingering in your coffee maker.
Step 7: Clean External Parts
While the descaling process is complete, take the time to wipe down the exterior of your Keurig K Compact with a clean cloth or sponge. Pay special attention to the water reservoir, drip tray, and other accessible parts to remove any coffee stains or spills.
Step 8: Reassemble and Enjoy
Once you have completed the descaling process and cleaned the external parts, reassemble your Keurig K Compact by placing the water reservoir back in its position and inserting a new K-Cup or coffee pod of your choice. Power on your coffee maker and brew a cup of hot water to ensure that all the descaling solution or vinegar residue has been thoroughly rinsed out. Now, your Keurig K Compact is ready to brew delicious coffee once again!
Regular descaling is an essential maintenance task for your Keurig K Compact to ensure optimal performance and delicious coffee brewing. It is recommended to descale your coffee maker every 3-6 months, or as per the manufacturer’s instructions, depending on the hardness of your water and frequency of use.
Troubleshooting and Tips
Even with proper descaling, you may encounter some common issues with your Keurig K Compact. Here are some troubleshooting tips to help you address potential problems and ensure smooth operation:
Slow Brewing or Dripping: If your Keurig K Compact is brewing slowly or dripping, it could be due to clogged needles. To fix this, power off your coffee maker, remove the K-Cup holder, and clean the needles using a paperclip or a needle. Be sure to also descale your machine regularly to prevent buildup.
Weak Coffee or Undesirable Taste: If your coffee is coming out weak or with an undesirable taste, it could be due to mineral deposits in the water reservoir or the internal components. Make sure to thoroughly descale your Keurig K Compact to remove any buildup and improve the taste of your coffee.
Water Leakage or Overflow: If you notice water leakage or overflow from your Keurig K Compact, it could be due to a clogged exit needle, a faulty water reservoir seal, or an overflowing water reservoir. Clean the exit needle, ensure the water reservoir seal is properly seated, and avoid overfilling the water reservoir to prevent these issues.
Error Messages: If your Keurig K Compact displays error messages on its screen, refer to the user manual or the Keurig customer support for troubleshooting steps specific to your model. This can help you identify and resolve any technical issues that may arise.
Regular Maintenance: Apart from descaling, it’s important to perform regular maintenance on your Keurig K Compact. This includes cleaning the external parts, such as the water reservoir, drip tray, and K-Cup holder, regularly to prevent coffee stains or spills from accumulating. Also, replace the water filter cartridge as per the manufacturer’s instructions to maintain water quality and prolong the life of your coffee maker.
In addition to troubleshooting, here are some tips to optimize the performance of your Keurig K Compact:
- Use filtered water to brew your coffee to prevent mineral deposits from affecting the taste and performance of your machine.
- Use only Keurig-approved K-Cups or coffee pods to ensure compatibility and avoid damage to your coffee maker.
- Store your K-Cups or coffee pods in a cool, dry place to prevent them from becoming stale or losing flavor.
- Avoid using excessive force when inserting or removing the K-Cup holder to prevent damage to the needle or the machine.
- Keep your Keurig K Compact in a clean and dry environment to prevent mold or mildew growth.
Maintenance and Prevention
Regular maintenance and prevention techniques are essential to keep your Keurig K Compact in top shape and ensure the longevity of your coffee maker. Here are some maintenance tips and preventive measures to consider:
Descaling Schedule: As mentioned earlier, descaling is a crucial maintenance task for your Keurig K Compact. It is recommended to descale your coffee maker every 3-6 months, depending on the hardness of your water and frequency of use. Set a reminder or mark it on your calendar to ensure you stay consistent with the descaling schedule.
Clean the External Parts: Apart from descaling, it’s important to regularly clean the external parts of your Keurig K Compact. This includes the water reservoir, drip tray, and K-Cup holder. Use a mild detergent and a soft cloth to clean these parts, and rinse them thoroughly to remove any soap residue. Dry them properly before reassembling them to prevent mold or mildew growth.
Replace Water Filter Cartridge: If your Keurig K Compact is equipped with a water filter cartridge, make sure to replace it as per the manufacturer’s instructions. Water filter cartridges help remove impurities from the water, ensuring better-tasting coffee and preventing mineral deposits from clogging the internal components of your coffee maker.
Use Filtered Water: Using filtered water to brew your coffee can help prevent mineral buildup in your Keurig K Compact. If your tap water is hard or has high mineral content, consider using filtered or distilled water to brew your coffee. This can help prolong the life of your coffee maker and maintain the taste quality of your coffee.
Avoid Overfilling: Avoid overfilling the water reservoir of your Keurig K Compact. Follow the manufacturer’s recommended water level markings to prevent water from overflowing and causing water leakage or overflow issues. Overfilling can also lead to mineral buildup in the internal components, affecting the performance of your coffee maker.
Handle K-Cups or Coffee Pods Carefully: When inserting or removing K-Cups or coffee pods, avoid using excessive force, as it can damage the needle or the machine. Follow the manufacturer’s instructions for properly inserting and removing K-Cups or coffee pods to prevent any mishaps.
Store K-Cups or Coffee Pods Properly: Store your K-Cups or coffee pods in a cool, dry place to prevent them from becoming stale or losing flavor. Avoid exposing them to heat, moisture, or direct sunlight, as it can affect the quality of your coffee.
Conclusion
Regular descaling not only maintains the performance of your Keurig K Compact but also ensures a consistently great cup of coffee. By following these simple steps every few months, you’ll keep your machine in top condition, prolonging its lifespan and preserving the quality of your favorite brews. Make it a habit, and your Keurig K Compact will continue to be your trusted coffee companion for years to come.
A. I. Moon
A.I. Moon, an experienced SEO Pythonista, spends his days coding and developing web applications to help business owners. A passionate coffee enthusiast, he believes that drinking coffee fuels his creativity and productivity. His day isn't complete without the rich aroma and invigorating warmth of a perfectly brewed cup. This love for coffee inspired him to found EspressoRivo, a platform dedicated to sharing his coffee knowledge and fostering a community of passionate aficionados.