Are you a coffee lover who relies on your trusty Keurig coffee maker for your daily caffeine fix? Imagine waking up in the morning, eager to brew your first cup of coffee, only to find that your Keurig machine has all the lights on but isn’t brewing. Frustrating, right? But worry not!
In this troubleshooting guide, we will explore the common causes for the “Keurig All Lights On and Not Working” issue and provide you with step-by-step instructions to get your beloved coffee maker up and running again.
As a barista with years of experience in the coffee industry, I have encountered this issue with Keurig machines before, and I understand how inconvenient it can be. Before jumping to conclusions and considering a replacement, it’s essential to understand that this issue can often be resolved with some simple troubleshooting steps.
Not only can troubleshooting save you time and money, but it can also prevent unnecessary waste by avoiding premature replacements. So, let’s dive into the common causes of this issue and how to troubleshoot them effectively.
Stay tuned as we uncover the mysteries behind the “Keurig All Lights On and Not Working” issue and provide you with a comprehensive guide to bring your coffee maker back to life! So grab a cup of your favorite brew, and let’s get started!
Common Causes for Keurig All Lights On Issue
One of the first steps in troubleshooting the “Keurig All Lights On and Not Working” issue is to identify the possible causes. Here are some common culprits that may be responsible for this problem:
Clogged or dirty needles: Over time, coffee grounds and mineral deposits can accumulate in the needles of your Keurig machine, leading to clogs. These clogs can prevent the water from flowing through the needles and result in the “All Lights On” issue. Regular cleaning of the needles is essential to ensure smooth brewing.
Water reservoir not properly seated: If the water reservoir of your Keurig machine is not properly seated, it can disrupt the water flow and prevent the brewing process from starting. It’s crucial to ensure that the reservoir is properly inserted and securely in place to avoid this issue.
Power supply issues: Sometimes, the “Keurig All Lights On and Not Working” issue may be due to power supply problems. Check the power source and cord to make sure there are no loose connections or power interruptions that may be affecting the operation of your Keurig machine.
Brew button not functioning: The brew button is a critical component of the Keurig machine that initiates the brewing process. If the brew button is not working properly or is stuck, it can prevent the machine from brewing. Troubleshooting the brew button and its components is necessary to resolve this issue.
Internal circuitry malfunction: In some cases, internal circuitry malfunction or electrical issues within the Keurig machine may be responsible for the “All Lights On” problem. Identifying and resolving these issues may require advanced troubleshooting techniques or professional repair services.
Other potential causes: Depending on the specific model of your Keurig machine, there may be other issues that could be causing the “Keurig All Lights On and Not Working” problem. These could include malfunctioning sensors, faulty switches, or other model-specific issues that may require further investigation and troubleshooting.
Step-by-Step Troubleshooting Guide
Basic Troubleshooting Steps:
Before diving into advanced troubleshooting techniques, it’s important to start with some basic troubleshooting steps that can often resolve the “Keurig All Lights On and Not Working” issue. Here are some simple steps you can take:
Power cycle your Keurig machine: Sometimes, a simple power cycle can reset the internal components of your Keurig machine and resolve the issue. Unplug your Keurig machine from the power source, wait for a few minutes, and then plug it back in. Press the power button to turn it on and check if the lights are functioning properly.
Check the water reservoir: Ensure that the water reservoir is properly seated and securely in place. If it’s not positioned correctly, it can disrupt the water flow and prevent the brewing process from starting.
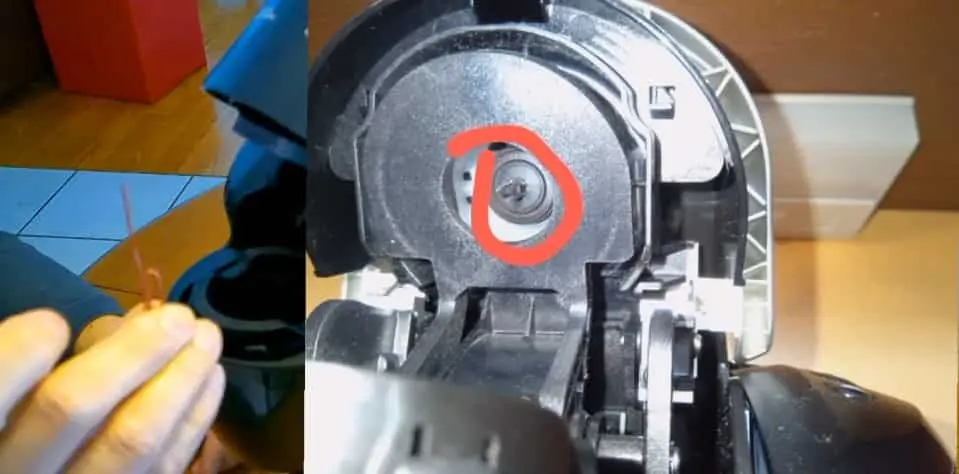
Clean the needles: Clogged or dirty needles can impede the water flow and cause the “All Lights On” problem. Use a paperclip or Keurig-approved needle-cleaning tool to clean the needles and remove any debris or mineral deposits.
Check the brew button: Press the brew button to check if it’s functioning properly. If it’s stuck or not responding, it may need cleaning or replacement.
Descaling your Keurig machine: Mineral build-up in the internal components of your Keurig machine can affect its performance. Descaling your machine with a Keurig-approved descaling solution can help remove mineral deposits and improve the brewing process.
Verify power supply: Ensure that your Keurig machine is properly connected to a reliable power source and there are no loose connections or interruptions in the power supply.
Check for model-specific solutions: Depending on the specific model of your Keurig machine, there may be model-specific solutions or troubleshooting steps recommended by the manufacturer. Refer to the user manual or Keurig’s official website for model-specific troubleshooting guidance.
If you’re a coffee lover like me, you probably rely on your Keurig K Compact to brew your daily cup of joe. But what do you do when you encounter the frustrating issue of your Keurig K Compact not brewing, and all the lights are on? Don’t worry, I’ve got you covered!
In my previous blog post, I’ve compiled a comprehensive guide on how to troubleshoot this common problem. From simple steps like checking the water reservoir to more advanced techniques like descaling the machine, my article provides step-by-step instructions to help you get your Keurig K Compact back to brewing perfect cups of coffee.
Advanced Troubleshooting Steps:
If the basic troubleshooting steps mentioned earlier didn’t resolve the issue, you can try these advanced troubleshooting steps to further diagnose and fix the “Keurig All Lights On and Not Working” problem:
Check for water blockage: Remove the water reservoir and check for any blockage or obstruction in the water lines or tubes. If you find any debris or mineral deposits, use a brush or a Keurig-approved cleaning tool to clean them out.
Reset the machine: Some Keurig models have a reset function that can help resolve certain issues. Refer to the user manual or Keurig’s official website to learn how to perform a reset on your specific Keurig machine.
Check for firmware updates: Keurig machines with digital displays may have firmware updates available that can fix software-related issues. Check Keurig’s official website for any available firmware updates for your specific model and follow the instructions to update your machine.
Inspect for mechanical issues: Carefully inspect your Keurig machine for any mechanical issues, such as broken or disconnected parts, damaged gaskets, or malfunctioning components. If you notice any physical damage, it may require professional repair or replacement.
Contact Keurig customer support: If you have tried all the troubleshooting steps and the issue persists, it’s best to contact Keurig’s customer support for assistance. They may be able to provide you with further troubleshooting guidance or arrange for a repair or replacement if your machine is still under warranty.
Remember, attempting to repair or modify your Keurig machine without proper knowledge or expertise may void the warranty or cause further damage. If you are not confident in your troubleshooting skills, it’s always best to seek professional help.
Are you tired of your Keurig not brewing a full cup of coffee? If you’re struggling with this common issue, don’t worry, I’ve got you covered! In my previous blog post, I’ve discussed in detail how to fix the problem of Keurig not brewing full cup. From simple hacks like descaling and cleaning the needle, to more advanced solutions like adjusting brew strength settings, I’ve covered all the possible solutions to help you get that perfect cup of coffee every time.
Tips and Preventive Measures
To avoid encountering the “Keurig All Lights On and Not Working” issue in the future, you can follow these tips and preventive measures:
Regular cleaning: Keeping your Keurig machine clean is essential for its proper functioning. Regularly clean the water reservoir, brew basket, K-Cup holder, and other removable parts according to the manufacturer’s instructions. Descale your machine at least once every three months to remove mineral deposits that can clog the water lines.
Use filtered water: Using filtered water in your Keurig machine can help prevent mineral deposits from building up and clogging the water lines. This can also improve the taste of your coffee and extend the lifespan of your machine.
Avoid using oily or flavored K-Cups: Oily or flavored K-Cups can leave residue in the brew basket and K-Cup holder, which can lead to clogging and affecting the performance of your Keurig machine. Stick to using regular coffee or tea K-Cups to prevent this issue.
Check for firmware updates: As mentioned earlier, regularly check for firmware updates for your Keurig machine on the official Keurig website. Keeping your machine’s firmware up to date can help fix software-related issues and improve its performance.
Handle your Keurig machine with care: Avoid rough handling or excessive force when inserting or removing the water reservoir, K-Cup holder, or other parts of your Keurig machine. Gentle handling can prevent damage to the internal components and ensure smooth operation.
Contact customer support for assistance: If you encounter any issues with your Keurig machine, don’t hesitate to contact Keurig’s customer support for assistance. They may be able to provide you with troubleshooting guidance or offer solutions to prevent similar issues in the future.
Conclusion
In conclusion, encountering the “Keurig All Lights On and Not Working” issue can be frustrating, but with proper troubleshooting steps, you can often resolve the issue and get your Keurig machine back up and running.
By following the basic troubleshooting steps, checking for firmware updates, and practicing preventive measures such as regular cleaning and using filtered water, you can minimize the chances of encountering this issue in the future.
However, if you’re unable to resolve the issue on your own, don’t hesitate to seek professional help or contact Keurig’s customer support for assistance. They have trained technicians who can provide further guidance and solutions to help you get your Keurig machine back in working order.
Remember to handle your Keurig machine with care, use compatible K-Cups, and keep it clean to ensure optimal performance and extend its lifespan. With proper maintenance and troubleshooting, you can continue to enjoy delicious cups of coffee from your Keurig machine for years to come.
We hope this comprehensive troubleshooting guide has been helpful in resolving the “Keurig All Lights On and Not Working” issue and provided you with valuable insights on how to prevent similar issues in the future. Happy brewing!
A. I. Moon
A.I. Moon, an experienced SEO Pythonista, spends his days coding and developing web applications to help business owners. A passionate coffee enthusiast, he believes that drinking coffee fuels his creativity and productivity. His day isn't complete without the rich aroma and invigorating warmth of a perfectly brewed cup. This love for coffee inspired him to found EspressoRivo, a platform dedicated to sharing his coffee knowledge and fostering a community of passionate aficionados.