Are you a coffee lover who enjoys a frothy and creamy milk-based coffee drink? If so, the Nespresso milk frother is an excellent addition to your coffee routine. Whether you have the Aeroccino or Barista model, knowing how to use your Nespresso milk frother properly can make all the difference in creating the perfect frothy milk for your coffee.
But, if you’re new to using a milk frother or just purchased a Nespresso milk frother, you may be wondering where to begin. In this comprehensive guide, we will cover everything you need to know about using your Nespresso milk frother, including the different types available, preparation, and step-by-step instructions for use. Plus, we’ll share some recipe and inspiration ideas to help you take your coffee experience to the next level.
So, get ready to become a pro at using your Nespresso milk frother and enjoy delicious, frothy, and creamy coffee drinks from the comfort of your own home!
Types of Nespresso Milk Frothers
Nespresso offers two types of milk frothers: the Aeroccino and the Barista. The Aeroccino is a compact and simple to use milk frother, while the Barista is a more advanced frother that allows you to customize your milk texture and temperature. Understanding the differences between the two types of frothers will help you determine which one is best for your needs.
The Aeroccino is a compact milk frother that comes in two models, the Aeroccino3 and the Aeroccino4. Both models have the same features, including the ability to make hot or cold froth, but the Aeroccino4 has a slightly larger capacity and an additional setting for hot milk. The Aeroccino is an excellent choice for those who want a simple and easy-to-use frother that creates consistent froth every time.
On the other hand, the Barista is a more advanced milk frother that offers a range of customization options. It comes with a milk pitcher and has settings for temperature, texture, and quantity. The Barista also has a self-cleaning function and is ideal for those who want to experiment with different types of milk or create more complex coffee drinks.
Both the Aeroccino and Barista frothers are designed to work with Nespresso machines and are compatible with a range of Nespresso capsules. Ultimately, the choice between the two frothers will depend on your needs, budget, and the type of coffee drinks you want to create.
No matter which type of Nespresso milk frother you choose, knowing how to use it properly is key to achieving the perfect milk froth. In the next section, we’ll cover how to prepare your frother for use and provide step-by-step instructions on how to use it.
Preparing to Use Your Nespresso Milk Frother
Before using your Nespresso milk frother, it’s essential to prepare it properly. This will ensure that your milk frother is clean and free from any residue that could affect the quality of your milk froth. Here are the steps to follow when preparing your Nespresso milk frother:
Wash the milk frother: Before using your Nespresso milk frother for the first time, wash the inside and outside of the jug with warm, soapy water. Rinse thoroughly and dry completely.
Check the whisk: Ensure that the whisk is securely attached to the lid of the milk frother. If it’s loose, tighten it before use.
Choose your milk: The type of milk you use will affect the quality and texture of your milk froth. We recommend using whole milk for the creamiest froth, but you can experiment with different types of milk to find the one that works best for you.
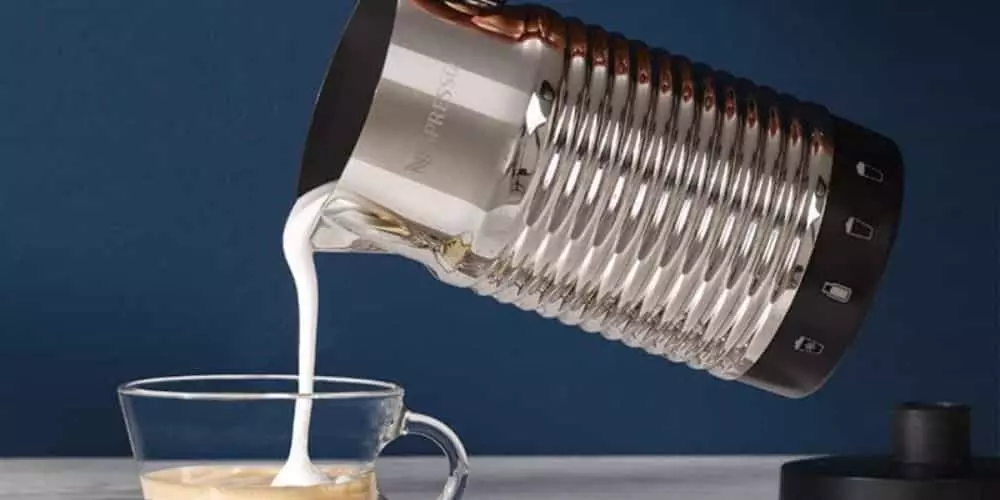
Fill the milk frother: Fill the milk frother with the desired amount of milk, making sure not to exceed the maximum level indicated on the inside of the jug. For hot milk, fill up to the lower indicator line, and for froth, fill up to the upper indicator line.
Place the lid and whisk: Place the lid with the whisk securely on top of the milk frother.
Plug in the milk frother: Plug in the milk frother and wait for it to heat up. The light on the base of the frother will turn red when heating and green when ready.
In the next section, we’ll cover step-by-step instructions on how to use your Nespresso milk frother to create the perfect milk froth for your coffee.
Steps for Using Your Nespresso Milk Frother
Now that you’ve prepared your Nespresso milk frother, it’s time to create the perfect milk froth for your coffee. Follow these step-by-step instructions to ensure that you get the best results every time:
- Press the button: Press the button on the base of the milk frother to start the frothing process. The light on the base will turn red, indicating that the frother is in operation.
- Wait for the frothing process to finish: The frothing process takes about 1-2 minutes, depending on the type of froth you want. The milk frother will automatically turn off when the frothing process is complete.
- Remove the lid and whisk: Remove the lid and whisk from the milk frother.
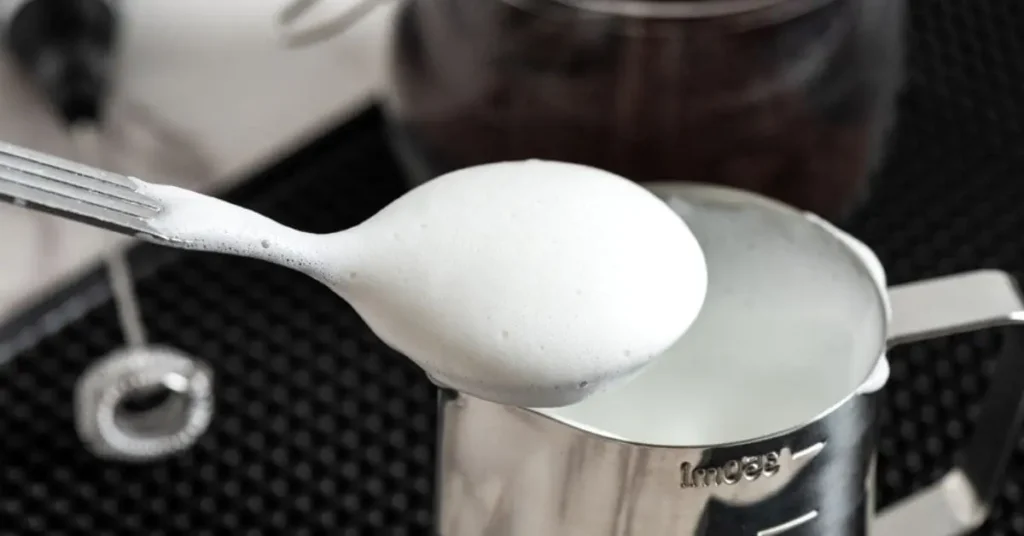
- Pour the milk froth: Pour the milk froth into your coffee, using a spoon to hold back the foam if necessary.
- Clean the milk frother: After use, clean the milk frother with warm, soapy water and a soft sponge. Rinse thoroughly and dry completely before storing.
If you’re using the Barista milk frother, the process is a bit more advanced. Here are the steps to follow:
- Choose your settings: Select the desired temperature, texture, and quantity settings using the touch controls on the milk frother.
- Fill the milk pitcher: Fill the milk pitcher with the desired amount of milk, making sure not to exceed the maximum level indicated on the inside of the pitcher.
- Place the pitcher and start the frothing process: Place the pitcher on the base of the milk frother and press the button to start the frothing process.
- Wait for the frothing process to finish: The frothing process takes about 3-4 minutes, depending on the settings you’ve chosen. The milk frother will automatically turn off when the frothing process is complete.
- Pour the milk froth: Pour the milk froth into your coffee, using a spoon to hold back the foam if necessary.
- Clean the milk frother: After use, clean the milk frother with warm, soapy water and a soft sponge. Rinse thoroughly and dry completely before storing.
By following these simple steps, you’ll be able to create the perfect milk froth for your coffee every time. Experiment with different types of milk and settings to find the combination that works best for you.
Recipes and Inspiration for Using Your Nespresso Milk Frother
Once you’ve mastered the art of using your Nespresso milk frother, the possibilities are endless! Here are some recipes and ideas to inspire you:
Cappuccino: A classic cappuccino is made with equal parts espresso, steamed milk, and milk froth. Use your Nespresso machine to make the perfect espresso shot, then froth your milk to create a creamy, velvety froth. Pour the milk and froth into your espresso shot, and sprinkle with cocoa powder or cinnamon for extra flavor.
Latte: A latte is similar to a cappuccino, but with more milk and less froth. Froth your milk using your Nespresso milk frother, then pour the frothed milk into your espresso shot. Top with a small amount of milk froth for a creamy finish.
Mocha: For a chocolatey twist on your coffee, add a spoonful of cocoa powder or hot chocolate mix to your milk before frothing. Combine with your espresso shot for a rich and indulgent mocha.
Iced coffee: Use your Nespresso milk frother to froth cold milk for an iced coffee treat. Add your favorite sweetener and a shot of espresso to a glass filled with ice, then pour your frothed milk over the top. Stir and enjoy!
Matcha latte: For a caffeine-free alternative, try frothing your milk with matcha powder to create a delicious and healthy matcha latte.
Hot chocolate: Use your Nespresso milk frother to create a creamy, frothy hot chocolate. Heat milk and hot chocolate mix in a saucepan, then transfer to your milk frother and froth until it’s thick and creamy. Pour into a mug and enjoy!
These are just a few ideas to get you started. Experiment with different flavors and ingredients to create your own unique coffee creations. The possibilities are endless with your Nespresso milk frother!
Some Frequently Asked Questions:
How do you use a Nespresso machine with a frother?
To use a Nespresso machine with a frother, simply fill the frother with milk, place it on the base, and press the button to froth the milk. Then, brew your Nespresso coffee as usual and combine the frothed milk with the coffee.
What do the buttons mean on Nespresso milk frother?
The buttons on a Nespresso milk frother control the temperature and frothing level of the milk. The first button is for hot milk, the second button is for cold milk, and the third button is for hot and frothed milk.
Does the Nespresso milk frother heat the milk?
Yes, the Nespresso milk frother heats the milk when the hot milk or hot and frothed milk buttons are selected.
How long do you froth milk Nespresso?
The amount of time needed to froth milk in a Nespresso frother will depend on the type of frother you have and the amount of milk being frothed. As a general guideline, frothing can take anywhere from 60 to 90 seconds.
What are the two lines on the Nespresso frother?
The two lines on a Nespresso frother indicate the minimum and maximum levels of milk that should be used in the frother. It is important not to fill the frother with more or less milk than the indicated levels.
How does Nespresso Vertuo frother work?
The Nespresso Vertuo frother works by heating and frothing milk using a spinning whisk. The frother can be used to create hot or cold frothed milk to add to your Nespresso Vertuo coffee.
Can you put creamer in a Nespresso milk frother?
While it is possible to put creamer in a Nespresso milk frother, it is not recommended as creamer is often thicker and may not froth as well as regular milk.
What are the 3 buttons on Nespresso?
The 3 buttons on a Nespresso machine typically control the size of the coffee shot – small, medium, or large. On a Nespresso milk frother, the 3 buttons control the temperature and frothing level of the milk.
Can almond milk be frothed?
Yes, almond milk can be frothed, but it may not froth as well as regular milk due to its lower protein content. To froth almond milk, it is best to use a frother specifically designed for non-dairy milk.
What is the best type of milk to froth?
The best type of milk to froth is whole milk, as it contains a higher percentage of fat and protein which allows it to froth well. However, other types of milk such as 2%, skim, and non-dairy milk can also be frothed with varying degrees of success.
In conclusion, the Nespresso milk frother is an excellent addition to any coffee lover’s arsenal. With a variety of types to choose from and easy-to-follow steps for use, it’s a great tool for creating barista-style drinks in the comfort of your own home. By following the steps outlined in this guide, you’ll be able to make perfectly frothed milk for a variety of coffee drinks in no time.
Remember to experiment with different ingredients and flavors to create your own unique coffee creations. With the Nespresso milk frother, the possibilities are endless. Whether you’re a cappuccino lover or a hot chocolate aficionado, you’ll be able to create delicious and indulgent drinks in no time. So go ahead and give it a try – your taste buds will thank you!
A. I. Moon
A.I. Moon, an experienced SEO Pythonista, spends his days coding and developing web applications to help business owners. A passionate coffee enthusiast, he believes that drinking coffee fuels his creativity and productivity. His day isn't complete without the rich aroma and invigorating warmth of a perfectly brewed cup. This love for coffee inspired him to found EspressoRivo, a platform dedicated to sharing his coffee knowledge and fostering a community of passionate aficionados.