We are here to make mastering the art of resetting your OXO coffee maker not just a useful skill but an essential skill. In this comprehensive guide, we delve into the intricacies of why a reset is important, exploring common issues that prompt the need for a reset.
As we navigate through the various OXO coffee maker models, including the Barista Brain, On Barista Brain, and Brew 9-Cup, we provide detailed step-by-step instructions tailored to each, ensuring users can troubleshoot and reset their machines with confidence. can do
Whether you’re a seasoned coffee enthusiast or a novice looking to enhance your brewing experience, this guide aims to demystify the reset process, empowering you to maintain optimal performance from your OXO coffee maker. So, let us embark on this journey to uncover the secrets behind how to reset your Ox Coffee Camera.
Why Resetting is Necessary:
In the realm of OXO coffee makers, occasional glitches and technical nuances can disrupt the seamless brewing experience. Understanding why resetting is necessary serves as the first step in troubleshooting these issues effectively. Electrical glitches, programming errors, and sensor malfunctions are common culprits that can impede the functionality of your OXO coffee maker.
Electrical glitches may arise due to power fluctuations or surges, leading to erratic behavior. Programming errors could result from user misconfigurations or software malfunctions. Sensor malfunctions, responsible for detecting water levels, temperatures, or brewing progress, may occasionally misfire, impacting the overall performance.
Exploring these common issues not only emphasizes the importance of resetting but also lays the groundwork for users to grasp the intricacies of their OXO coffee maker’s functionality, empowering them to troubleshoot effectively and ensure a consistently delightful brewing experience.
Understanding Your OXO Coffee Maker Models:
To embark on the journey of mastering the art of resetting your OXO coffee maker, it’s imperative to first acquaint yourself with the diverse range of OXO models available.
Each model boasts unique features and specifications, requiring a nuanced approach to resetting. Whether you own the Barista Brain, On Barista Brain, or Brew 9-Cup model, understanding the distinctions is key to successfully troubleshooting and resetting your machine.
We will discuss the features of each model in detail, highlighting their unique features and functionality. And I will discuss step by step how you can reset your Ox coffee maker. Let’s get started
Step-by-Step Guide for OXO Coffee Maker Reset:
Embarking on the journey to master the art of resetting your OXO coffee maker requires a systematic and model-specific approach. Before delving into the step-by-step instructions, it’s crucial to prepare for the reset by ensuring safety precautions are in place and gathering the necessary tools. We’ll navigate through the intricacies of resetting three prominent OXO coffee maker models: Barista Brain, On Barista Brain, and Brew 9-Cup.
Preparing for the Reset:
- Safety Precautions: Begin by ensuring the coffee maker is unplugged and cool to the touch. Safety should always be the top priority.
- Gather Necessary Tools: Have the user manual on hand for reference, and if applicable, prepare any specialized tools recommended for the reset.
Resetting OXO Barista Brain Coffee Maker:
- Carefully review the user manual for model-specific guidance.
- Ensure the water reservoir is empty, and the machine is unplugged.
- Press and hold the specified reset button for a designated duration, typically outlined in the manual.
- Reconnect the machine to power and follow any additional prompts on the display.
- Test the reset by brewing a small amount of water without coffee grounds.
Resetting OXO On Barista Brain Coffee Maker:
- Follow the same safety precautions and initial steps as for the Barista Brain model.
- Identify the specific reset button or combination of buttons, as detailed in the user manual.
- Execute the reset sequence and wait for any indicators or prompts on the machine’s display.
- Plug the coffee maker back in and run a test brew without coffee to ensure proper functioning.
Resetting OXO Brew 9-Cup Coffee Maker:
- Familiarize yourself with the user manual’s instructions for the Brew 9-Cup model.
- Empty the water reservoir and unplug the coffee maker.
- Locate and engage the reset functionality as specified in the manual.
- Reconnect the machine to power and follow any on-screen instructions.
- Verify the reset’s success by running a test brew with water only.
These meticulous step-by-step instructions tailored to each OXO coffee maker model, users can confidently navigate the resetting process, ensuring their machines are primed for delivering the perfect cup of coffee.
Plug In and Power On:
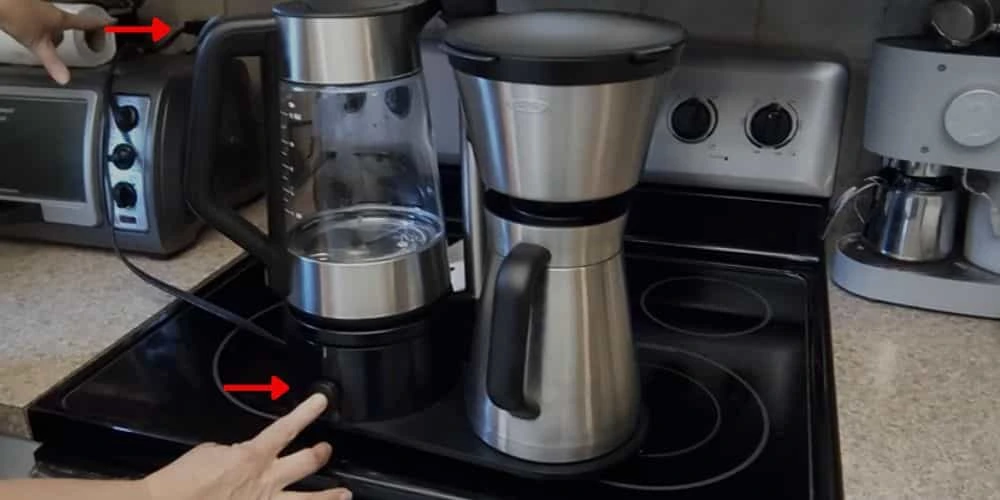
Before diving into the intricacies of resetting your OXO coffee maker, it’s essential to commence with a foundational step – plugging in and powering on the machine. This preliminary action sets the stage for the subsequent steps in the resetting process. Ensure the coffee maker is placed on a stable surface near a power source, and follow these key steps:
- Safety First: Prioritize safety by confirming that the coffee maker is unplugged before any adjustments are made. This prevents any inadvertent electrical mishaps during the process.
- Secure Power Source: Locate a reliable power outlet near your coffee maker and confirm that it is in good working condition. Using a grounded outlet with the correct voltage is crucial to prevent electrical issues.
- Plug In the Coffee Maker: Carefully insert the coffee maker’s power cord into the designated outlet. Ensure a snug fit to prevent any loose connections that may hinder the resetting process.
- Power On the Machine: Once securely plugged in, power on the coffee maker. Depending on your OXO model, this may involve pressing a dedicated power button, flipping a switch, or engaging with a touchscreen interface.
- Verify Power Indicator: Check for any power indicator lights or screen prompts that signal the machine is successfully powered on. This confirmation ensures a stable starting point for the subsequent steps in the resetting guide.
Perform a Test Brew:
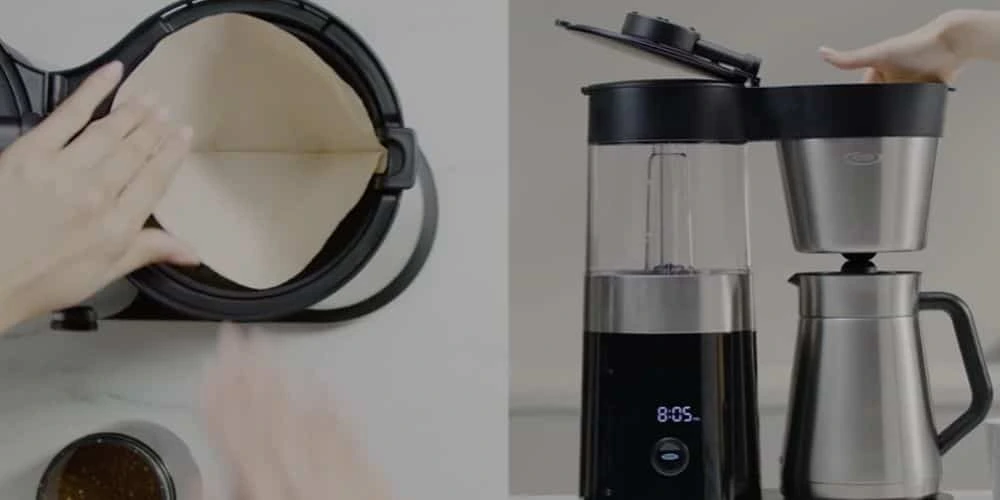
Once your OXO coffee maker is plugged in, powered on, and ready for action, the next crucial step in the resetting process is performing a test brew. This step serves as a practical validation, ensuring that the reset has been executed successfully and that your machine is primed for optimal brewing. Follow these detailed steps for a seamless test brew:
- Select the Brew Setting: Refer to your OXO coffee maker’s user manual to understand how to navigate and select the brew settings. Choose a basic setting without adding coffee grounds to facilitate a straightforward test.
- Water Reservoir Preparation: Ensure the water reservoir is filled with fresh, clean water. For this initial test, focus on water alone to assess the functionality without introducing the complexity of coffee grounds.
- Position the Carafe or Mug: Place an empty carafe or mug on the coffee maker’s warming plate to collect the test brew. This step ensures that the brewing process can be observed and assessed.
- Initiate the Brew: Start the brewing process according to the selected setting. Observe the flow of water through the machine, paying attention to any unusual noises or behaviors that may indicate lingering issues.
- Monitor Temperature and Flow: During the test brew, check the temperature of the water and the consistency of the flow. An effective reset should result in a smooth and appropriately heated water dispensing process.
- Inspect the Coffee Maker Components: While the test brew is in progress, visually inspect the coffee maker for any leaks, unusual sounds, or abnormal behavior. This comprehensive check ensures that the reset has addressed potential malfunctions.
- Evaluate the End Result: Once the test brew is complete, examine the quality of the brewed water. Look for signs of proper heating and water flow, ensuring that the coffee maker is operating optimally.
- Repeat if Necessary: If any issues persist or if the test brew indicates irregularities, consider repeating the reset process or consulting the troubleshooting section of your user manual.
Performing a test brew, users can confidently assess the effectiveness of the reset, troubleshoot any lingering issues, and ensure their OXO coffee maker is poised to deliver consistently excellent brews. This step not only verifies the success of the resetting process but also contributes to a seamless and enjoyable coffee-making experience.
Regular Maintenance:
Beyond the realm of resetting, regular maintenance plays a pivotal role in ensuring the longevity and optimal performance of your OXO coffee maker. Incorporating a proactive maintenance routine into your coffee-making ritual can mitigate the need for frequent resets and contribute to a consistently delightful brewing experience. Here’s a guide to effective regular maintenance:
Daily Cleaning Routine:
- Empty the coffee grounds promptly after each use to prevent residue buildup.
- Wipe down the exterior of the machine with a damp cloth to remove any spills or splashes.
- Rinse the carafe and any removable components thoroughly to prevent the accumulation of coffee oils and residues.
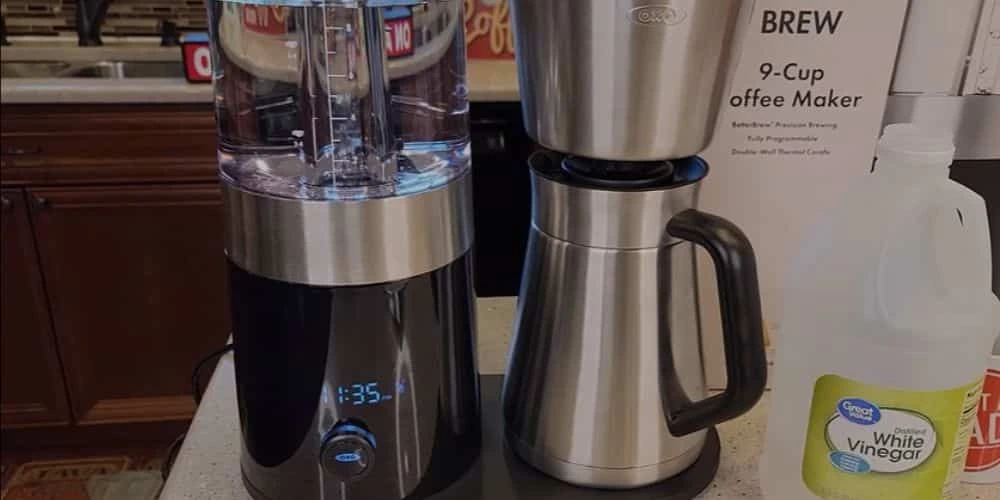
Weekly Cleaning and Descaling:
- Follow the manufacturer’s guidelines to descale your OXO coffee maker regularly. Descaling removes mineral deposits that can affect performance.
- Clean removable parts, such as the filter basket and carafe, with mild soap and water.
- Check for any trapped coffee grounds or residues in areas that are not easily accessible during daily cleaning.
Inspect and Replace Filters:
- If your OXO coffee maker uses water filters, adhere to the recommended replacement schedule to ensure optimal water quality for brewing.
- Inspect the filter for any visible signs of wear or clogging. Replace it if necessary to maintain the purity of the water used in brewing.
Deep Cleaning as Needed:
- Periodically perform a deep cleaning of your coffee maker, addressing areas that may not be part of your daily or weekly routine.
- Remove and clean internal components according to the user manual, ensuring a thorough maintenance routine.
Store Properly During Inactivity:
- If you anticipate prolonged periods of inactivity, store the coffee maker in a cool, dry place.
- Ensure the water reservoir is emptied to prevent the growth of mold or bacteria.
Regularly Check for Updates:
- Stay informed about firmware or software updates for your specific OXO model. These updates may provide performance enhancements or address known issues.
Professional Servicing:
- Consider professional servicing if you encounter persistent issues or if your coffee maker is due for a comprehensive inspection and tune-up.
Your OXO coffee maker also reduces the likelihood of encountering issues that necessitate frequent resets. A well-maintained machine ensures a consistently high-quality brewing experience, allowing you to savor the rich flavors of your favorite coffee without interruptions.
Troubleshooting Tips:
Even with diligent maintenance and precise resetting, occasional challenges may arise when operating your OXO coffee maker. To empower users to overcome these hurdles, we’ve compiled a set of troubleshooting tips tailored to address common issues. Navigate through these insights to troubleshoot effectively and ensure the seamless performance of your OXO coffee maker:
Error Messages and Their Meanings:
- Familiarize yourself with the error messages specific to your OXO model by referring to the user manual.
- Decipher the meaning behind each error message to pinpoint potential issues and troubleshoot accordingly.
Power Supply Checks:
- Verify that the coffee maker is securely plugged into a functional power outlet.
- Inspect the power cord for any visible damage, and replace it if necessary.
Resetting After Power Outages:
- In the event of a power outage, unplug the coffee maker and wait a few minutes before plugging it back in.
- Execute the reset procedure outlined in the user manual to recalibrate the machine.
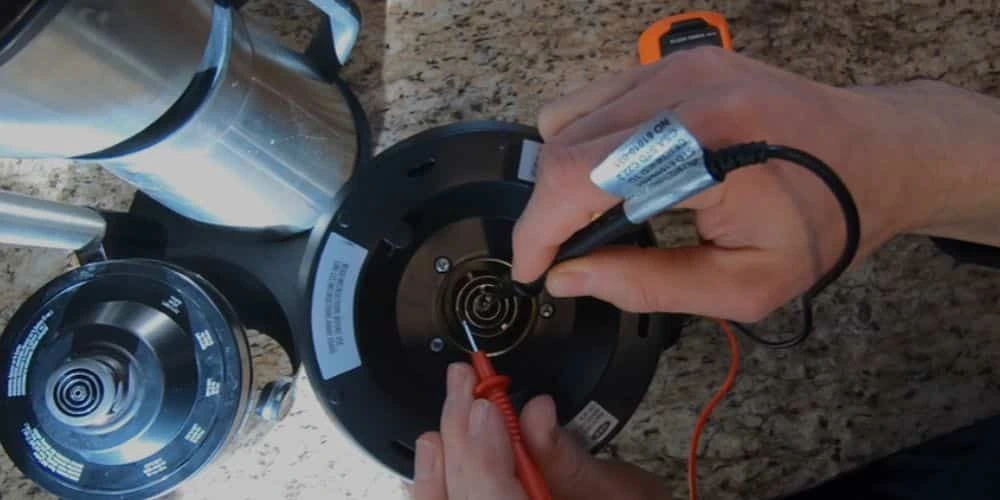
Sensor Calibration:
- If the machine’s sensors seem inaccurate, check for any blockages or debris that may be affecting their performance.
- Perform a reset to recalibrate sensors and restore accurate readings.
Addressing Water Flow Issues:
- Ensure the water reservoir is properly seated and filled with an adequate amount of water.
- Check for any clogs in the water lines or dispensing mechanisms and clear them as needed.
Programming Glitches:
- If programmable features are not working as intended, review the user manual to confirm the correct programming steps.
- Consider resetting the machine to default settings and reprogramming according to your preferences.
Temperature Concerns:
- If the coffee temperature is consistently too hot or too cold, consult the user manual for temperature adjustment options.
- Perform a test brew after any adjustments to assess the impact on temperature.
Consult Online Communities:
- Engage with online forums or communities dedicated to OXO coffee maker users. Share your concerns and benefit from the collective experiences of other users.
Customer Support and Professional Help:
- If troubleshooting on your own proves challenging, contact OXO customer support for guidance.
- Consider professional servicing if issues persist or if your coffee maker is due for a comprehensive inspection.
By systematically addressing issues through these troubleshooting tips, users can navigate challenges effectively, minimizing disruptions to their coffee-making routine. These insights, coupled with the step-by-step resetting guide, create a comprehensive resource for OXO coffee maker enthusiasts seeking a seamless brewing experience.
Additional Insights and Best Practices:
Best practices in your OXO coffee maker routine can elevate your brewing experience. Consider these tips to further enhance the longevity, performance, and enjoyment of your OXO coffee maker:
Water Quality Matters:
- Use filtered or bottled water to minimize mineral deposits and enhance the flavor of your coffee.
- If your local water source is high in mineral content, consider using a water softener.
Preheat Before Brewing:
- Run a cycle with just water before brewing your first pot of coffee. This helps to prime the machine and ensures the optimal temperature for brewing.
Mindful Bean Selection:
- Choose high-quality coffee beans and store them in an airtight container to preserve freshness.
- Experiment with different coffee blends to find the flavor profile that suits your preferences.
Avoid Stale Coffee Grounds:
- Grind coffee beans just before brewing to retain the maximum flavor and aroma.
- Store coffee grounds in a cool, dark place to prevent staleness.
Regularly Update Firmware or Software:
- Stay informed about any firmware or software updates released by OXO for your specific coffee maker model.
- Regular updates may introduce new features, improvements, or bug fixes.
Explore Customization Features:
- Take advantage of programmable settings on your OXO coffee maker to tailor brewing parameters to your taste.
- Experiment with different brew strengths and temperatures to discover your perfect cup.
Optimal Cleaning Frequency:
- While daily and weekly cleaning is essential, consider more frequent cleaning during periods of heavy usage.
- Remove and clean parts like the showerhead and filter basket to prevent clogs and maintain consistent water flow.
Mind the Warming Plate:
- If your OXO coffee maker has a warming plate, avoid leaving the carafe on it for extended periods to prevent overheating and affecting the coffee’s taste.
Educate Yourself Through Resources:
- Explore online tutorials, coffee-making blogs, and user communities to gain additional insights and tips from experienced OXO coffee maker users.
Consider Backup Accessories:
- Keep spare parts, such as filters and carafes, on hand to quickly replace any worn or damaged components.
Conclusion:
Resetting your OXO coffee maker is a straightforward process that can revive your machine and have it serving up delightful cups of coffee once again. By following these simple steps, you’ll be able to troubleshoot minor issues and keep your coffee maker in top-notch condition. Remember, a well-maintained coffee maker is the key to unlocking the full potential of your favorite coffee beans. Happy brewing!
Ronsil
Meet Ronsil, the master barista behind EspressoRivo. With years of experience in the coffee industry, he brings a wealth of knowledge and passion to the table. As the owner of a successful coffee shop, Ronsil is a sought-after adviser in the field. His expertise and love for the craft shines through in every cup he serves. We are honored to have him as part of our team at EspressoRivo